These instructions explain how to replace the old incandescent rear lights on an Avan camper (the indicators and combination brake / tail lights) with the new LED lights now available from Avan.
Replace the indicator lights
Replace the combination brake / tail lights
Gallery
| Background information | |
| Replacing A’van tail lamps | Helpful guidance on installation tools and techniques that informed the approach evident in these instructions. It pre-dates by some years the ready availability of LED lights from Avan and reflects the effort required at that time to source suitable replacements for the “horrid” old lamps |
| Avan caravan LED light upgrades | A short video [12:43] showing “how easy it is to upgrade your LED lights on your Avan Caravan”. |
| Parts, hardware and tools required |
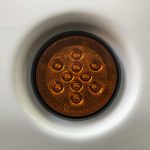
| LED lights: – Indicators x 2 — Avan Part No. B3061-N, $22 ea – Combination brake / tail x 2 — Avan Part No. B3062, $22 ea The Avan website notes the diameter of the lights is 110 mm. The overall diameter of the base of the lights is, however, 125 mm — the same as the old lights and more or less the diameter of the base of the light recesses on the Avan. The lens diameter is about 105 mm. |
| Self-tapping screws x 16 (4G x 9 mm self-tapper pan-head slotted / Phillips drive) |
| Clear silicone adhesive sealant |
| Heatshrink tubing (5.0 mm, 50% shrink ratio) |
| Screwdrivers: Phillips, flathead |
| Wire strippers |
| Soldering iron and solder |
| Heat source for shrinking heatshrink e.g. heat gun, disposable cigarette lighter |
| Drill and drill bits (2 mm, 9 mm) |
| Compass (drawing tool) |
Replace the indicator lights
These instructions apply to both LHS and RHS indicators unless otherwise noted. They are essentially the same as those for replacing the combination brake / tail lights.
Before you start
Remove the old lights
Prepare the light recesses and Avan wiring
Prepare the LED lights
Connect the LED lights to the Avan wiring
Fit the LED lights to the Avan
| Before you start |
| Confirm the old lights are working on the Avan and fix if faulty |
| Confirm the new LED lights are working out of the box and replace if faulty To check each light, hold its white wire to the -ve terminal of a 9-volt battery and red wire to the +ve terminal — all ten LEDs in the light will illuminate at high intensity if serviceable |
| Remove the old lights |
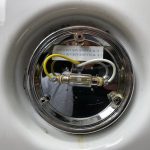
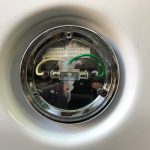
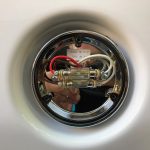
| Remove the lens and rubber seal from each light |
| Remove the bulbs |
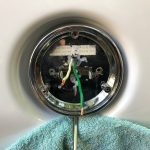
| Disconnect the wires from the bulb holders: white (ground) and yellow (power) on the LHS; white (ground) and green (power) on the RHS |
| Remove the Phillips head screws securing the light bases to the recesses on the Avan |
| Prise each base off its recess with a flathead screwdriver The bases are fixed to the recesses with silicone adhesive (in addition to the screws) and the adhesive seals must be broken |
| Prepare the light recesses and Avan wiring |
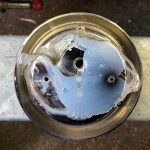
| Clean the recesses with mineral turps, removing all old silicone adhesive (including from the wires and holes) |
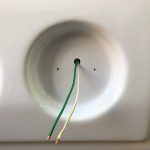
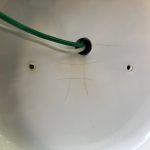
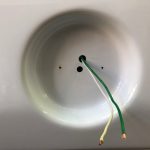
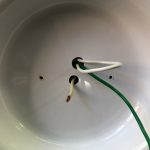
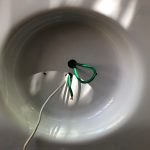
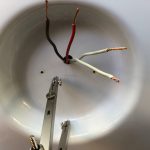
| Drill a hole in the centre of each recess and re-route the Avan wires through it as outlined below The old wire holes are off-centre to align with the exit location of the wires from the old light bases; the LED light wires exit from the centre of the base |
| Locate and mark the centre of each recess To find the approximate centre with a compass, scribe a 6 cm radius arc from each of the the 12, 3, 6 and 9 o’clock points around the inner edge of the recess — the arcs will delineate a small area in the middle of the recess within which is the centre |
| Drill a 9 mm hole in centre of each recess |
| Re-route the Avan wires for each light through the new holes |
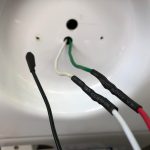
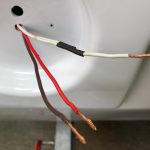
| Prepare the wires in each recess for connection to the wires from the LED lights e.g. if soldering the connections, slide 4 cm of heat shrink onto each Avan wire, strip 1.5 cm of insulation from the ends of the wires and twist the exposed strands of each |
| Prepare the LED lights |
| Remove the lenses from the LED lights by prising them off the bases with a flathead screwdriver Insert the blade of the screwdriver between lens edge and base, first prising at 1 o’clock and then at 9 o’clock i.e. at the locations of two of the three lens retention clips |
| For each light: |
| Double the end of the black wire (approx. 1 cm) back on itself and seal the loop with heatshrink (the wire is redundant for the indicators) |
| Strip 1.5 cm insulation from the end of the red wire and twist the exposed strands |
| Cut the ring terminal from the white wire, strip 1.5 cm insulation from the end of the wire and twist the exposed strands |
| Connect the LED lights to the Avan wiring |
| Connect the LED light wires to the corresponding Avan wires (white to white, red to yellow on the LHS, red to green on the RHS) e.g. if soldering, twist together the ends of each two-wire pair, solder the joints and seal with heatshrink |
| Confirm the lights are working when activated from the car |
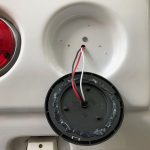
| Pull the base out from the recess a little (to allow room to complete the next steps) |
| Fit the LED lights to the Avan |
| For each light, drill four pilot holes in the Avan recess for the securing screws: |
| Centre the light base in the recess and orient correctly To orient the base, position the collar on its inside rim (which locates the corresponding tang on the inside rim of the lens) at 12 o’clock and ensure the four in-line LEDs below the collar are vertical |
| Mark the location of the first pilot hole (1 o’clock) and drill the hole (2 mm for 4g screw) |
| Screw the base loosely to the recess through the first pilot hole |
| Orient the base, then drill the second pilot hole (7 o’clock) |
| Fix the base in position with a screw through the second pilot hole |
| Drill the remaining two pilot holes (4 o’clock and 10 o’clock) |
| Remove the two screws and pull the base away from the recess a little (to allow room to complete the next steps) |
| For each light: |
| Fill the old screw and wire holes in the recess with silicone adhesive and dab a little in each new hole |
| Run a bead of silicone adhesive around the underside of the light base |
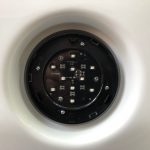
| Loosely screw the base to the recess then press and hold it against the recess while tightening the screws |
| Fit the lens |
Replace the combination brake / tail lights
These instructions apply to both LHS and RHS combination lights unless otherwise noted. They are essentially the same as those for replacing the indicator lights.
Before you start
Remove the old lights
Prepare the light recesses and Avan wiring
Prepare the LED lights
Connect the LED lights to the Avan wiring
Fit the LED lights to the Avan
| Before you start |
| Confirm the old lights are working on the Avan and fix if faulty |
| Confirm the new LED lights are working out of the box and replace if faulty To check the brake-light function of each light, hold its white wire to the -ve terminal of a 9-volt battery and red wire to the +ve terminal — all ten LEDs in the light will illuminate at high intensity if serviceable To check the tail-light function, hold its white wire to the -ve terminal of the battery and black wire to the +ve terminal — all ten LEDs in the light will illuminate at lower intensity than the brake light if serviceable |
| Remove the old lights |
| Remove the lens and rubber seal from each light |
| Remove the bulbs |
| Disconnect the wires from the bulb holders: white (ground) x 2, red (brake-light power) and brown (tail-light power) |
| Remove the Phillips head screws securing the light bases to the recesses on the Avan |
| Prise each base off its recess with a flathead screwdriver The bases are fixed to the recesses with silicone adhesive (in addition to the screws) and the adhesive seals must be broken |
| Prepare the light recesses and Avan wiring |
| Clean the recesses with mineral turps, removing all old silicone adhesive (including from the wires and holes) |
| Drill a hole in the centre of each recess and re-route the Avan wires through it as outlined below The old wire holes are off-centre to align with the exit location of the wires from the old light bases; the LED light wires exit from the centre of the base |
| Locate and mark the centre of each recess To find the approximate centre with a compass, scribe a 6 cm radius arc from each of the the 12, 3, 6 and 9 o’clock points around the inner edge of the recess — the arcs will delineate a small area in the middle of the recess within which is the centre |
| Drill a 9 mm hole in centre of each recess |
| Re-route the Avan wires for each light through the new holes |
| Prepare one white wire and the red and brown wires in each recess for connection to the LED lights e.g. if soldering the connections, slide 4 cm of heat shrink onto each of the three wires, strip 1.5 cm of insulation from the ends of them and twist the exposed strands of each The second white Avan wire is redundant and can be terminated e.g. cut some off and heatshrink the remainder to the first white wire |
| Prepare the LED lights |
| Remove the lenses from the LED lights by prising them off the bases with a flathead screwdriver Insert the blade of the screwdriver between lens edge and base, first prising at 1 o’clock and then at 9 o’clock i.e. at the locations of two of the three lens retention clips |
| For each light: |
| Strip 1.5 cm insulation from the end of the red wire and twist the exposed strands |
| Strip 1.5 cm insulation from the end of the black wire and twist the exposed strands |
| Cut the ring terminal from the white wire, strip 1.5 cm insulation from the end of the wire and twist the exposed strands |
| Connect the LED lights to the Avan wiring |
| Connect the LED light wires to the corresponding Avan wires (white to white, red to red, black to brown) e.g. if soldering, twist together the ends of each two-wire pair, solder the joints and seal with heatshrink |
| Confirm the lights are working when activated from the car |
| Pull the base out from the recess a little (to allow room to complete the next steps) |
| Fit the LED lights to the Avan |
| For each light, drill four pilot holes in the Avan recess for the securing screws: |
| Centre the light base in the recess and orient correctly To orient the base, position the collar on its inside rim (which locates the corresponding tang on the inside rim of the lens) at 12 o’clock and ensure the four in-line LEDs below the collar are vertical |
| Mark the location of the first pilot hole (1 o’clock) and drill the hole (2 mm for 4g screw) |
| Screw the base loosely to the recess through the first pilot hole |
| Orient the base, then drill the second pilot hole (7 o’clock) |
| Fix the base in position with a screw through the second pilot hole |
| Drill the remaining two pilot holes (4 o’clock and 10 o’clock) |
| Remove the two screws and pull the base away from the recess a little (to allow room to complete the next steps) |
| For each light: |
| Fill the old screw and wire holes in the recess with silicone adhesive and dab a little in each new hole |
| Run a bead of silicone adhesive around the underside of the light base |
| Loosely screw the base to the recess then press and hold it against the recess while tightening the screws |
| Fit the lens |

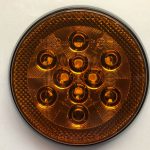
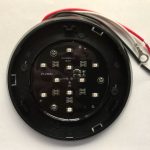
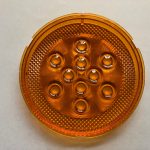
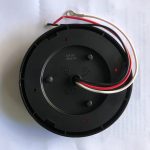


Thanks for the information on this post!
It has been most informative and led me through the process of replacing the technologically obsolete rear lights of my 2019 Aliner.
Glad they were of use, Bill.
Have you found that these led upgrade lights from Avan Spares are waterproof? I have just purchased a set and will be installing soon using your comprehensive instructions (thank you). The reason I ask is because the old festoon lights on my Cruiser leaked into the lenses and the Avan warranty fix was to drill a small hole in the bottom of the lenses to let the water out. The new led lights do not appear to have a waterproof seal between the base and the lens.
They’ve been watertight to date and they’ve been through heavy rain on a recent road trip, withstood downpours while the van has been parked uncovered in the driveway at home, and survived indirect hosing. While you’re right in noting there’s no waterproof seal between the base and the lens, my take is one isn’t necessary because the lens is a flush fit on the base and if any water did get through there’s a raised rim encircling the electronic components that should protect them. If you’re still concerned about water getting in you could always run a fine bead of sealant around the rim of the lens before clipping it to the base.